Use Raspberry PI to Route Spotify over USB to your Behringer XR18 or Mackie DL Series mixer
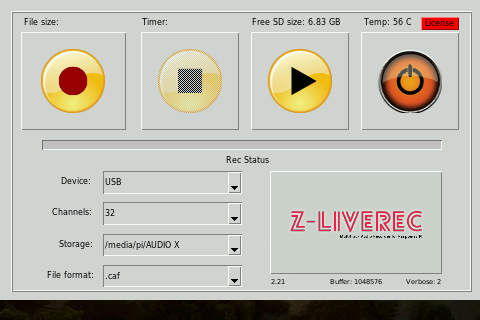
A common task when doing concerts is to have pause music during the gig breaks – and of course “YES” you can always have an extra iPhone or computer running with Spotify installed and use two analog inputs on your mixer. (Simple!) – But to raise the bar slightly and make something a little bit more advanced – I came up with the following solution as a spin-off when researching and developed the USB multi-track recorder Z-LiveRec for mixers like Behringer XR18 and Mackie DL16/32S and using a Raspberry PI as the heart. 🙂
Multi-tracks over USB 2 or 3 is a fantastic idea, which is used by most mixer vendors on the market. You can both send and receive up to 16 or 32 or even 64 tracks (dependent on your hardware) at the same time. So there is some scenarios which you can use here. One common is to utilize plug-in effects in a DAW tool like a cool echo or reverb…and address it as a effect on your DL32S, send it to a Mac over USB to the DAW/plug-in and immediately get the signal back over USB to your mixer again. See the video recording describing this on the following link.
For Raspberry PI there is a Spotify Connect Client called Raspotify available which can be used as extension adding an extra sound device on the network seen from any of your PC, Mac, Iphone running Spotify client etc. Simply – you are able to tell Spotify to send the music to your Raspberry device and then use the headphone output etc to hear the music. In this case your PC/iPhone/iPad etc controls the music…and the Raspberry just executes the task and playing the music stream. Benefit received: You could stand in the audience and trigger the music from your iPad running Master Fader and the Spotify client wirelessly!
But to use two analog inputs connected to your Raspberry PI on your mixer to play this digital stream feels in this case feels a bit annoying. (Especially for me which is using my DL32S to record and play 32 channels over USB using the Z-LiveRec App.)
However, I found the following scenario which enable me to use the Raspberry PI to also send the Raspotify music stream over USB to my mixer. So the Spotify music stream is now been sent to return channel 1&2 on my mixers (Behringer XR18 or DL16/32S or DL32R mixer)
To configure a Raspberry PI to handle this you need to do two steps:
a) Install the Raspotify Client,
b) Configure Raspberry to send the information further over USB to your mixer.
So lets get down to business – how to do it?
- After connecting your mixer via USB to the raspberry PI.
aplay -lRun the command “aplay -l” in a terminal window on your Raspberry PI and look for the USB Card number for your mixer. (e.g. 1 or 2 – this could differ when running on a hdmi screen when doing the configuration – until running on a 3.5″ touch screen)
2. Execute the command in a terminal window on your Raspberry:
sudo nano /usr/share/alsa/alsa.confLook for the lines: (A couple of pages down)
"defaults.ctl.card 0"
"defaults.pcm.card 0"


Change these from 0 to your Card number from what is reported by "aplay"
"defaults.ctl.card 1"
"defaults.pcm.card 1"

Save the file by pressing CTRL X - press Yes...and then return to save.
3. Install the Raspotify Client: (In a terminal window on your Raspberry PI)
curl -sL https://dtcooper.github.io/raspotify/install.sh | sh
4. Now, edit the Raspotify configuration file (Set in your parameters and uncomment some configuration in this file)
sudo nano /etc/default/raspotify

DEVICE_NAME="Mackie DL32S"
BITRATE="320"
OPTIONS="--username <your_spotify_name> --password <xxxxx>"
BACKEND_ARGS="--backend also"

Save the file by pressing CTRL X - press Yes...and then return to save.
5. Now, patch the asound.conf file (This file may not exist – so nano editor will create it. Please note that you need change the CARD=X to your mixer environment reported by aplay on step #1.
sudo nano /etc/asound.conf

pcm.!default{
type asym
playback.pcm {
type plug
slave.pcm "dmix:CARD=1,RATE=48000"
}
}

Save the file by pressing CTRL X - press Yes...and then return to save.
6. Last – do a reboot of your Raspberry!
The Raspberry needs to be on the same network as your mixer (Either over ethernet or via WI-FI) – The whole network needs to have access to internet to get the music stream and the Spotify Connect run.
But you will now be able to see your DL-32S in the Spotify application as a device from your PC/Mac/Iphone/iPad and if you hit play…the Rasberry will start to play music and send it over USB port 1&2 to your mixer…to be recieved on the Return channel 1&2 on your mixer.
Pretty neat? 🙂